
This is the first in a series of articles on how to install Railo (ColdFusion) and MariaDB (MySQL) on a Fedora virtual machine (VM) using VirtualBox.
Why? For starters, they can all be downloaded and installed for free.
Free is good, but these are enterprise-class solutions that can be used to power high-volume websites. Also, all of these tools are easy to use and manage while allowing you to grow as a developer and scale your applications as needed. What starts as a small test on your desktop can grow into an application with clustered servers with cloud storage and more.
ColdFusion provides rapid application development that allows you can to build dynamic websites with fewer lines of code. Railo is Java-based and runs in Apache Tomcat which is also free and open source.
MariaDB, an open source fork of MySQL, has grown to support more enterprise-level features than MySQL while retaining support for MySQL.
Fedora, based on RedHat Linux, enjoys growing community support for innovative features.
VirtualBox is free, easy to use and provides a full set of features for creating and managing VMs, including cloning and snapshots. It also helps that I am more than just a little familiar with each of these tools.
This first post covers the creation of a Fedora VM. Subsequent posts will detail the installation of MariaDB and Railo. The last post will show how to configure a MariaDB datasource in Railo and create a simple page to test the datasource. All of the instructions in this series use the following versions:
- VirtualBox 4.3.12 64-bit
- Fedora 20 64-bit (Kernel 3.14.9)
- Railo 4.2.1
- MariaDB 5.5.37
The “host” for VirtualBox is a laptop running Windows 7 (64-bit).
The second post discusses the installation and setup of MariaDB.
The third post will cover the installation and setup of Railo including connecting to the MariaDB datasource.
Download VirtualBox from http://www.virtualbox.org
Download Fedora from http://fedoraproject.org
Install VirtualBox.
Run VirtualBox.
Click the “New” icon.
Name and operating system
Name the VM, e.g., CFFedora. Choose the Type, Linux. Choose the Version Fedora (64 bit).
Click Next.

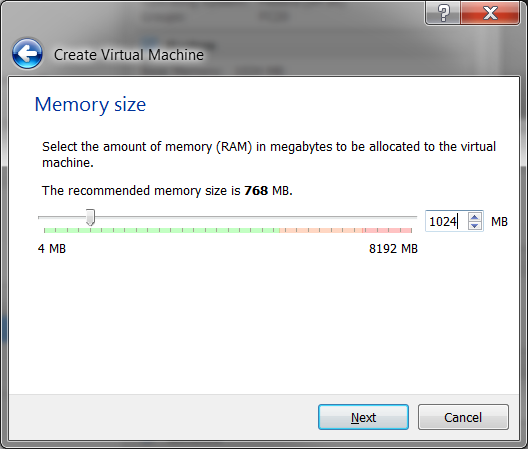
Memory Size
Select at least 1024MB of memory. Hint: You can type the number of MB in the text box.
Click Next.
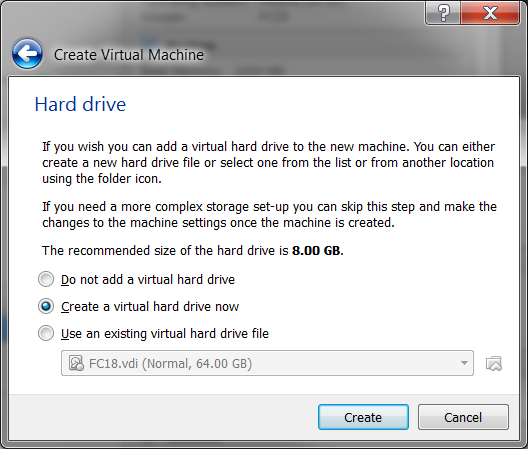
Hard drive
Choose “Create a virtual hard drive now”.
Click Create.
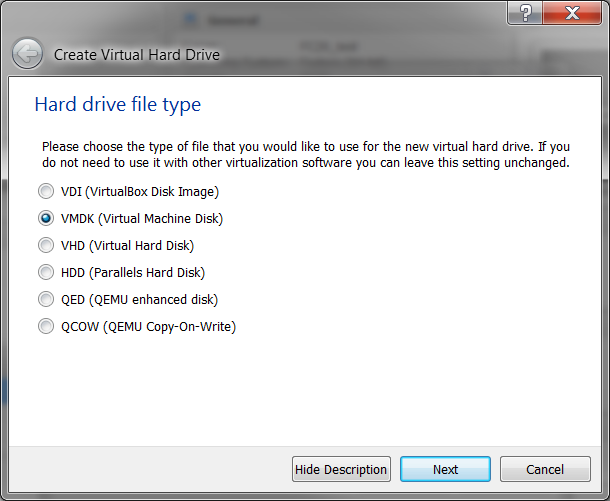
Hard drive file type
Choose VMDK for the file type. Hint: File type definitions, https://www.virtualbox.org/manual/ch05.html#vdidetails
Click Next.
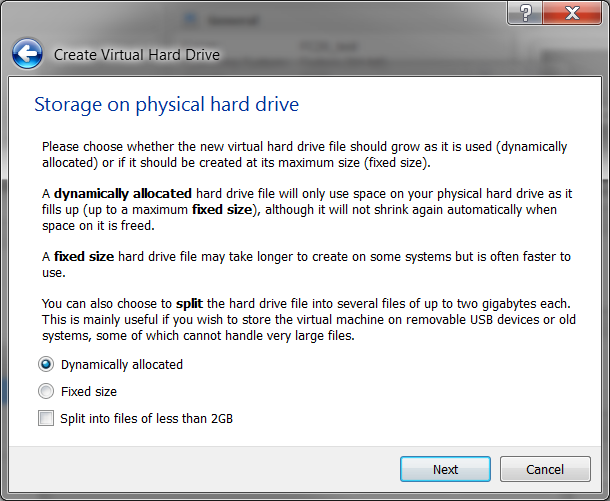
Storage on physical hard drive
Choose Dynamically allocated.
Click Next.
File location and size
Choose at least 16GB for the size.
Click Create.

The new VM should appear in your list of VMs. Right-click on the VM and choose Settings.
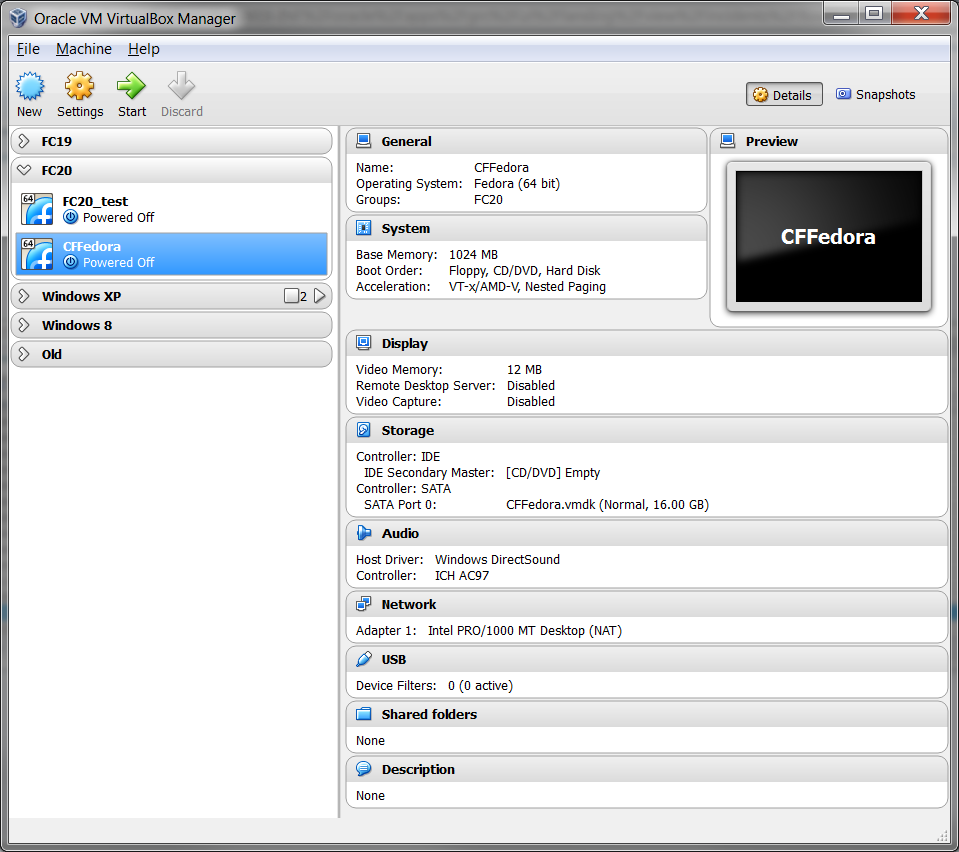
Click the Storage menu option in the left pane. Click the Empty entry under Controller: IDE. Click the disc icon under Attributes, to the right of the CD/DVD Drive menu. Select “Choose a virtual CD/DVD disk file”. Select the Fedora ISO file and click Open. Check the “Live CD/DVD” option.

Optionally, increase the video memory available under the Display menu. Click OK. Select the VM and click the Start icon. After the VirtualBox splash screen, you should see Fedora starting.
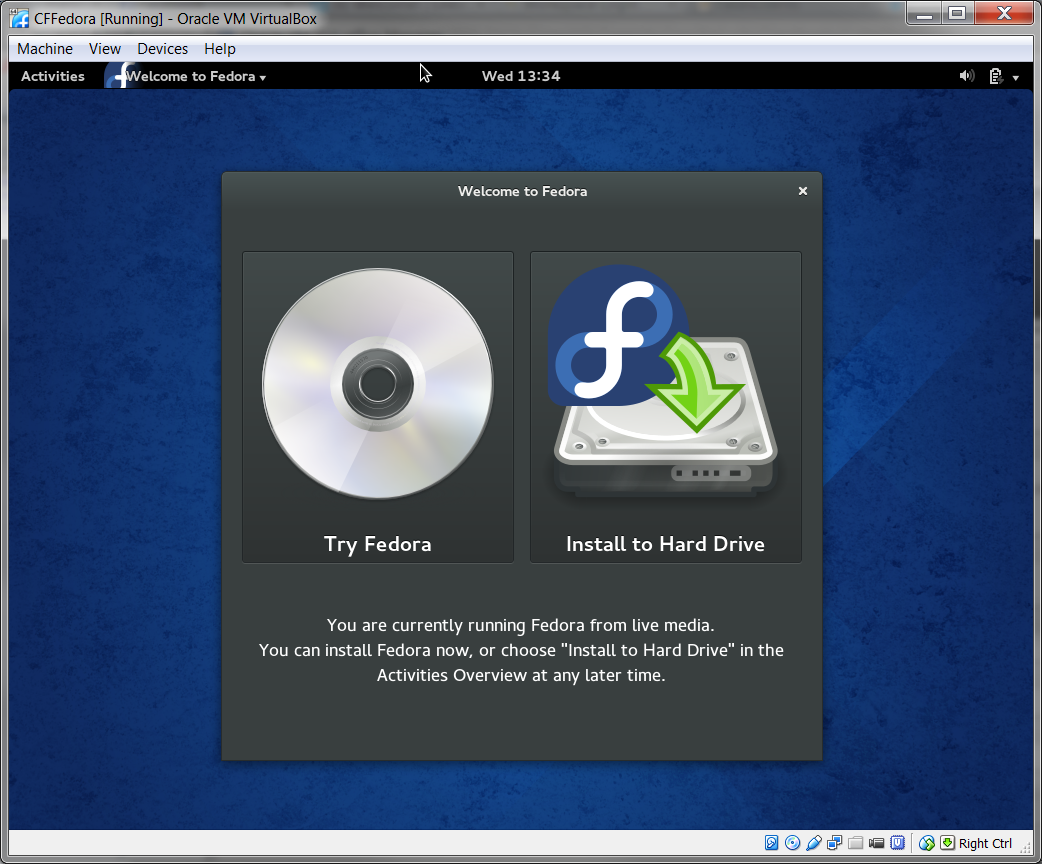
Once Fedora starts, click the “Install to Hard Drive” option.
Choose your language and click Continue.

Click Installation Destination, it should have a warning triangle.

Click the ATA VBOX HARDDISK so that a check icon appears over it. Click Done.
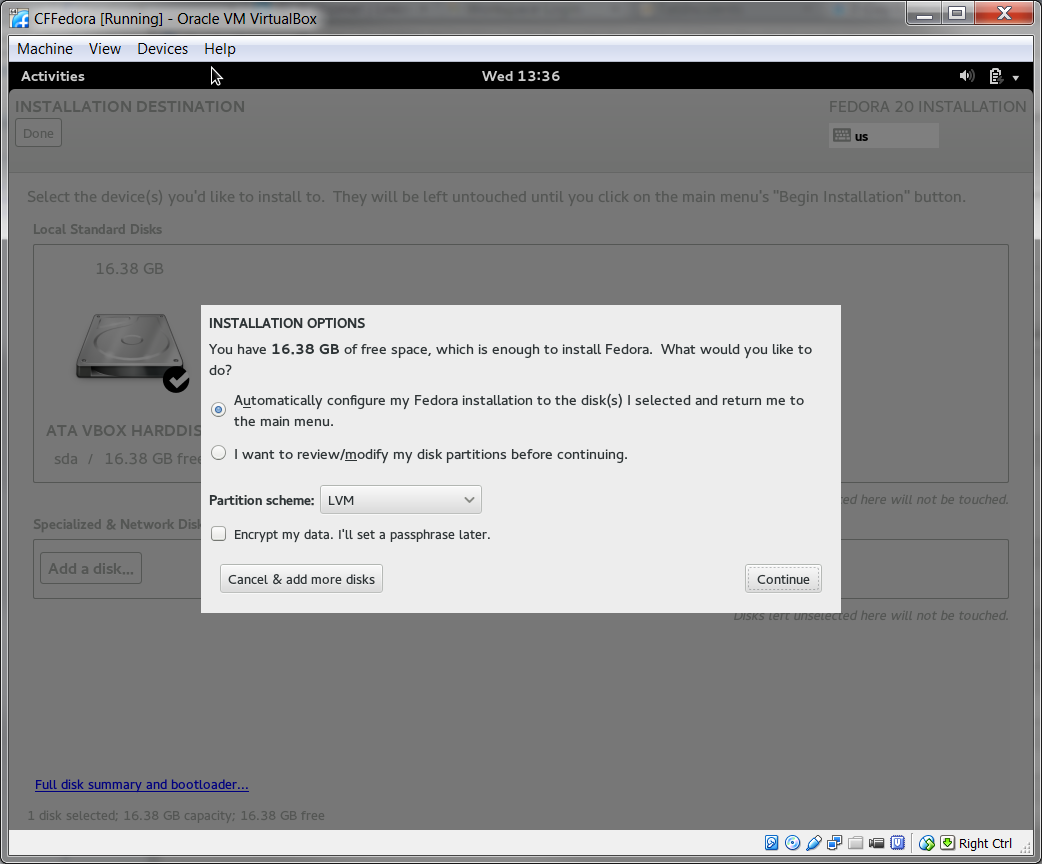
If prompted, allow Fedora to auto configure the disk. Click Begin Installation.
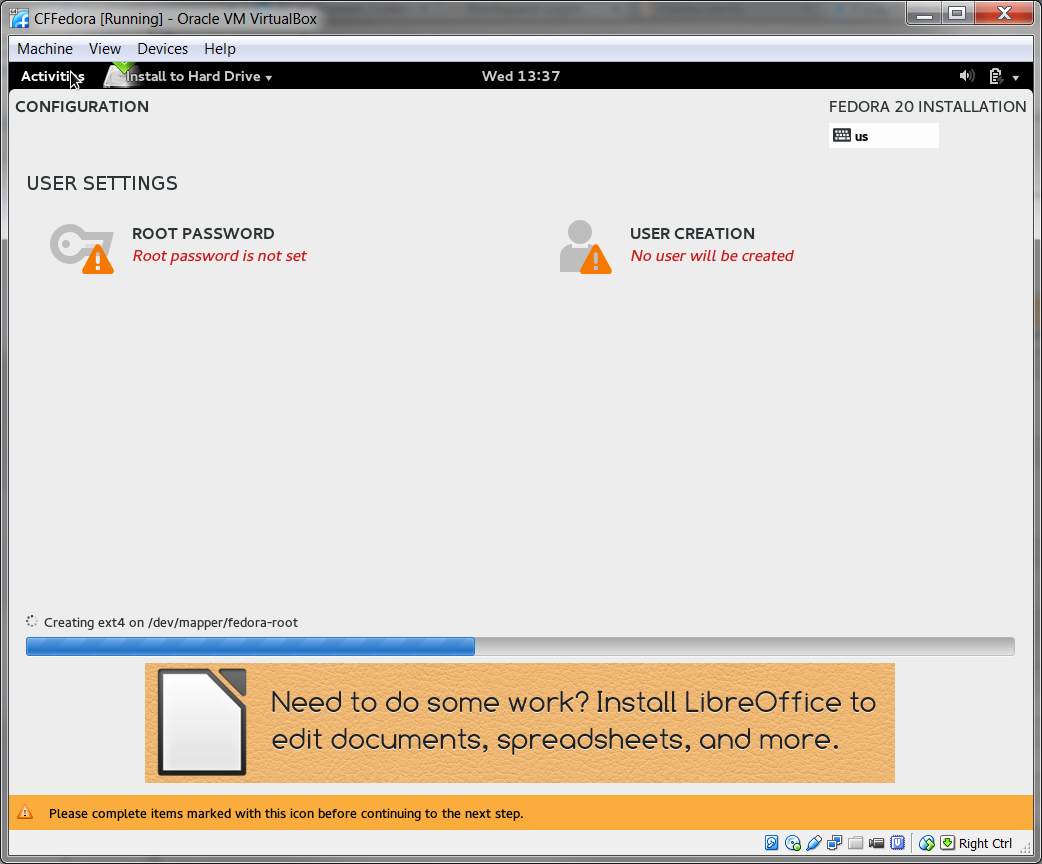
While you wait for the software to install, you can set the root password and setup an initial user.
Set the root password to something secure but that you won’t forget.
For the initial user, create a user named webdev. We’ll use it later to create the railo website.
Once the installation completes, click Quit.
Then you can power off the machine.
After you power off the machine you can edit the storage setting to remove the ISO from the IDE Controller.
You may also want to clone the VM at this point so that you have a freshly installed Fedora VM available.
After you restart the VM, login as the user you created during the install process.
After logging in, Fedora may prompt you for language and keyboard information and then display a getting started page.
Use su to add webdev to the sudoers group and run yum update to update all packages.
usermod -a -G wheel webdev
TIPS:
The Activities menu in the top left corner is similar to the Windows Start menu and provides access to applications.
The icons in the top right corner allow you to change the volume and power off or restart the VM. The icons in the top right corner will also allow you access to Settings which is similar to the Windows Control Panel.
You may have to use the Search box after clicking activities to open a terminal.
In a terminal window, CTRL-SHIFT-T opens a new tab.
Run yum update in a terminal to update all packages.
sudo yum update
Install nano for basic text editing: yum install nano
Install jEdit. http://www.jedit.org/
Install dbViz. http://www.dbvis.com/
One of the benefits of using a VM is the ability to clone the VM so that you have a point in time recovery if something fails.
Install VBoxAdditions (Optional)
Maybe you’re lucky and the VirtualBox additions that allow for bidirectional clipboard and folders shared between the host and guest will work just fine. To find out, from the Devices menu, choose “Insert Guest Additions CD Image…” This should mount an ISO and run a command that installed the VirtualBox guest tools. This usually fails in a terminal window with a sparse suggestion on how to fix the failure. I had to run the two following commands:
sudo yum install kernel-devel-3.11.10-301.fc20.x86_64
sudo yum install gcc
After that, I navigated to /run/media/user/VBOXADDITIONS_4.3.12_93733 and ran ./VBoxLinuxAdditions.run. Then reboot the VM and test the bidirectional clipboard.
Useful Links:
You may need to install software that is not available in the standard Fedora yum repositories. RPMFusion (http://rpmfusion.org/) usually has what you need.
Leave a Reply
You must be logged in to post a comment.